
Starlink Gen 3 V4 Accessories Australia: The Complete Guide to Mounts, Cables & Installation
If you have a Starlink Gen 3 V4 system and are planning a permanent installation, the Starlink dish itself is only part of the setup. Choosing the right mount, cable and installation accessories can make a significant difference to how secure, tidy and practical your Starlink installation is.
For Australian homes, farms, businesses, sheds, caravans, RVs and other mobile applications, the installation requirements can vary considerably. A solution that works well on a tiled residential roof may not be suitable for a corrugated metal roof, pole installation or portable setup.
This guide explains the main Starlink Gen 3 V4 accessories available in Australia, what each type is designed for and how to choose the right setup for your installation.
Looking for Gen 3 V4 accessories?
View the complete Starlink Gen 3 V4 range at Total Antenna
What is Starlink Gen 3 V4?
Starlink’s current standard hardware uses a Starlink antenna with a Router 3, designed to provide high-speed satellite internet for residential and everyday online use. The Router 3 uses Wi-Fi 6 technology, tri-band 4 × 4 MU-MIMO and two latching Ethernet LAN ports. Starlink specifies coverage of up to 297 m² and support for up to 235 connected devices under its stated specifications.
The Gen 3/V4 hardware is particularly well suited to installations where the dish needs to be positioned away from obstructions and securely mounted.
That is where the right accessories become important.
Why does your Starlink Gen 3 V4 need a proper mount?
The Starlink antenna needs a clear view of the sky to operate effectively. A temporary placement on the ground may be suitable for testing, but a permanent installation often requires a more secure mounting solution.
A properly selected mount can:
- Secure the Starlink antenna against movement
- Provide a more professional permanent installation
- Position the antenna above potential obstructions
- Make cable routing easier
- Suit different Australian roof types and installation environments
- Provide additional stability in exposed locations
The best Starlink mount depends heavily on where you are installing the dish.
Choosing the right Starlink Gen 3 V4 mount
There isn’t one universal mount that is ideal for every installation. Consider the roof material, mounting surface, exposure to wind, required height and whether you want a permanent or portable setup.
1. Starlink Gen 3 V4 roof mounts
A roof mount is one of the most common options for a permanent residential or commercial Starlink installation.
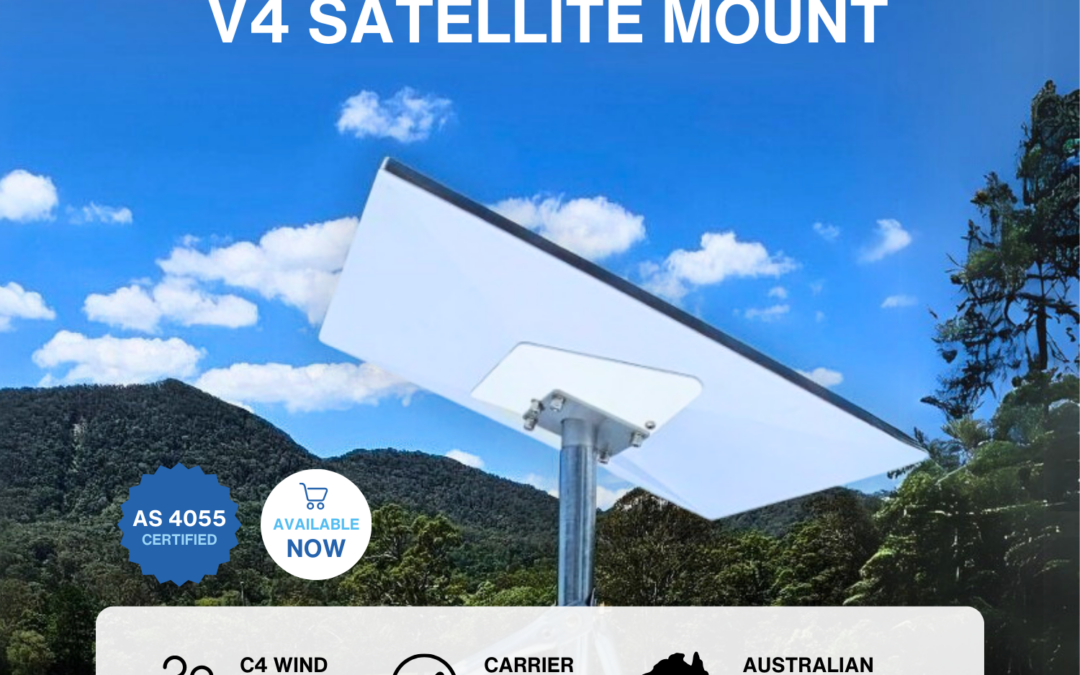
Total Antenna’s Starlink Gen 3 V4 Mount is designed as a C4-rated Australian roof mounting solution and is particularly suited to installations where additional wind resistance is important.
For exposed locations or buildings where the Starlink dish is installed high above the roofline, selecting a suitably engineered mount is especially important.
See the Starlink Gen 3 V4 C4-rated mount.
2. Starlink Gen 3 V4 tin roof mounts
Australian homes, sheds and rural buildings commonly use corrugated or metal roofing.
A dedicated Starlink Gen 3 V4 tin roof mount can provide a cleaner installation than attempting to adapt a general-purpose bracket.
Total Antenna offers heavy-duty tin roof mounting options designed specifically for Gen 3 V4 installations, along with stainless steel options for applications where corrosion resistance and long-term durability are important.
This makes a tin roof mount worth considering for:
- Rural properties
- Sheds and workshops
- Farm buildings
- Industrial buildings
- Residential metal roofs
- Coastal or exposed installations
3. Starlink Gen 3 V4 tile and gutter mounts
Tiled roofs can present different installation challenges.
Drilling through roof tiles is not always desirable, particularly where an installation can be achieved using another mounting method.
A Starlink Gen 3 V4 tile gutter mount can provide an alternative approach by using the roof structure while avoiding unnecessary tile penetration.
This type of installation can be particularly useful when the objective is to keep the mounting hardware secure while minimizing disruption to the roof.
4. Starlink Gen 3 V4 pole mounts
A pole mount can be useful when the Starlink antenna needs additional height or when a roof-mounted installation isn’t the preferred solution.
Pole mounting can be suitable for:
- Rural properties
- Farms
- Workshops
- Large blocks
- Commercial sites
- Custom structures
- Some RV and mobile applications
Total Antenna offers a Gen 3 V4 heavy-duty pole mount as well as a Gen 3 pole adapter for installations where a pole-based mounting arrangement is preferred.
5. Portable Starlink Gen 3 V4 mounting
Not every Starlink installation is permanent.
If you use Starlink while travelling, camping or moving between locations, a portable mounting solution can make setup and pack-down considerably easier.
A portable mount allows the Starlink system to be deployed without committing to a permanent roof or pole installation.
Don’t forget the Starlink Gen 3 cable
The cable is one of the most important parts of the installation, but it is also one of the easiest components to overlook.
Starlink’s standard hardware specifications include a 15-metre Starlink cable in the current standard kit.
However, installation requirements vary. The distance between the dish and the router may mean you need a different cable arrangement or additional cable-management hardware.
Total Antenna stocks Starlink GEN 3 cables in different lengths, giving installers more flexibility when planning a Gen 3 V4 installation.
When planning cable routing, consider:
- The distance between the dish and router
- Whether the cable passes through a wall or roof
- Weather exposure
- Protection from abrasion
- Cable bends and strain
- Whether an entry point needs to be waterproofed
- Future access for maintenance
Avoid leaving unnecessary cable exposed where it could be damaged by weather, vehicles, animals or other equipment.
Where should you install the Starlink router?
The router is designed for indoor use, and Starlink specifies the V4 router as IP56 rated and configured for indoor use.
That means the router should generally be positioned in a suitable indoor or protected location rather than simply being left outside with the dish.
Its physical dimensions are approximately 298.6 × 120.4 × 43.4 mm, so planning its mounting location before installation is worthwhile.
For installations where desk or shelf space is limited, a dedicated Starlink Gen 3 V4 router mount can secure the router to a wall or other suitable surface.
Starlink itself describes its Gen 3 Router Mount as a solution for wall or surface mounting, with cable retention designed to help prevent cables from being accidentally pulled out.
Total Antenna offers the Gen 3 V4 router mount in several configurations, including options for the router and power supply.
Starlink Gen 3 V4 installation checklist
Before installing your Starlink system, consider the following:
- Check for obstructions: The antenna needs a clear view of the sky.
- Choose the mounting location: Decide whether a roof, pole, gutter, wall or portable solution is most appropriate.
- Consider wind exposure: Higher and more exposed installations require appropriate mounting hardware.
- Plan cable routing: Work out the shortest practical and safest cable route.
- Protect cable entry points: Use suitable weatherproofing and cable-entry hardware.
- Position the router correctly: Keep the router indoors and in a location that provides suitable Wi-Fi coverage.
- Allow for maintenance: Make sure the installation can be inspected or serviced if required.
- Use appropriate hardware: Roof and structural installations should use mounting hardware suitable for the building and installation conditions.
Which Starlink Gen 3 V4 accessory do you need?
The easiest way to choose the right accessory is to start with the installation location.
| Installation | Accessory to consider |
|---|---|
| Residential roof | Gen 3 V4 roof mount |
| High-wind or exposed location | C4-rated Gen 3 V4 mount |
| Corrugated/metal roof | Gen 3 V4 tin roof mount |
| Tiled roof | Gen 3 V4 tile/gutter mount |
| Pole installation | Gen 3 V4 pole mount or pole adapter |
| RV/mobile use | Portable Gen 3 mount |
| Long cable run | Gen 3 cable |
Total Antenna’s Gen 3 V4 range brings these mounting, cable and installation accessories together in one category.
Why buy Starlink Gen 3 V4 accessories from an Australian antenna specialist?
Starlink installations aren’t always as simple as putting the dish on a roof and plugging it in.
Australian buildings have a wide variety of roof materials, mounting conditions and environmental exposures. A rural property, coastal home, commercial building and caravan can all require very different installation hardware.
Total Antenna specializes in antenna, satellite, cellular and communications equipment, with a dedicated range of Starlink Gen 3 V4 mounts, cables and accessories.
If you’re unsure which mount is appropriate for your roof or installation, choosing the hardware based on the actual mounting surface and environment is a better approach than simply choosing the cheapest bracket.
Frequently Asked Questions
What is the best mount for Starlink Gen 3 V4?
The best mount depends on your installation. A C4-rated roof mount can be appropriate for exposed roof installations, while dedicated tin roof, tile/gutter and pole mounts are better suited to their respective mounting environments.
Can I mount Starlink Gen 3 V4 on a metal roof?
Yes. Dedicated Gen 3 V4 metal and tin roof mounting options are available. The correct mounting method depends on the roof profile and structure.
Can Starlink Gen 3 V4 be pole mounted?
Yes. Gen 3 V4 pole mounting options are available for installations where additional height or a pole-based installation is preferred.
How long is the Starlink Gen 3 cable?
The current standard Starlink kit includes a 15 m cable. Longer or replacement Gen 3 cables are also available for installations with different cable-routing requirements.
Can I wall mount the Starlink Gen 3 router?
Yes. Starlink provides a Gen 3 Router Mount designed to attach the router to a wall or other surface, with cable retention to help prevent accidental cable pulls.
Does Starlink Gen 3 have Ethernet?
Yes. The Gen 3 router has two latching Ethernet LAN ports with removable covers.
Is the Starlink Gen 3 router waterproof?
Starlink specifies the Gen 3 router as IP56 water resistant but configured for indoor use. It should therefore be installed in an appropriate indoor or protected location rather than treated as an outdoor router.
Find the right Starlink Gen 3 V4 accessories
Whether you’re installing Starlink on a family home, rural property, shed, commercial building, caravan or other location, the mounting hardware and cable installation are important parts of getting a reliable long-term setup.
From C4-rated roof mounts and heavy-duty tin roof brackets to pole mounts, tile/gutter mounts, router mounts, cables and waterproof Ethernet accessories, Total Antenna has a range of options for Gen 3 V4 installations in Australia.
Shop Starlink Gen 3 V4 mounts, cables and accessories at Total Antenna →
If you’re not sure which mount or accessory is right for your installation, contact Total Antenna before ordering so you can select hardware appropriate for your mounting surface and application.